Scheduled Message Setup
The Scheduled Message section found within the Workflow Setup is where you can customize your appointment confirmation and reminder messages to be sent to the customer, both at time of booking and 24-hours prior to the scheduled appointment time. We do also have an after hours configuration for appointments that are scheduled for hours outside the Company Setup page's configured Business Hours. This is an optional feature, and can be customized or disabled as with standard appointment reminders, as will be described below.
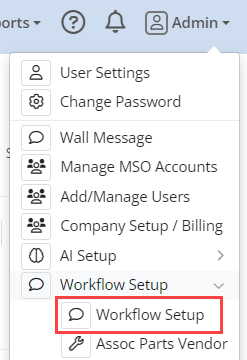
First, you will need to be logged in to an admin level profile, and access the Workflow Setup page from your top right menu as seen below.
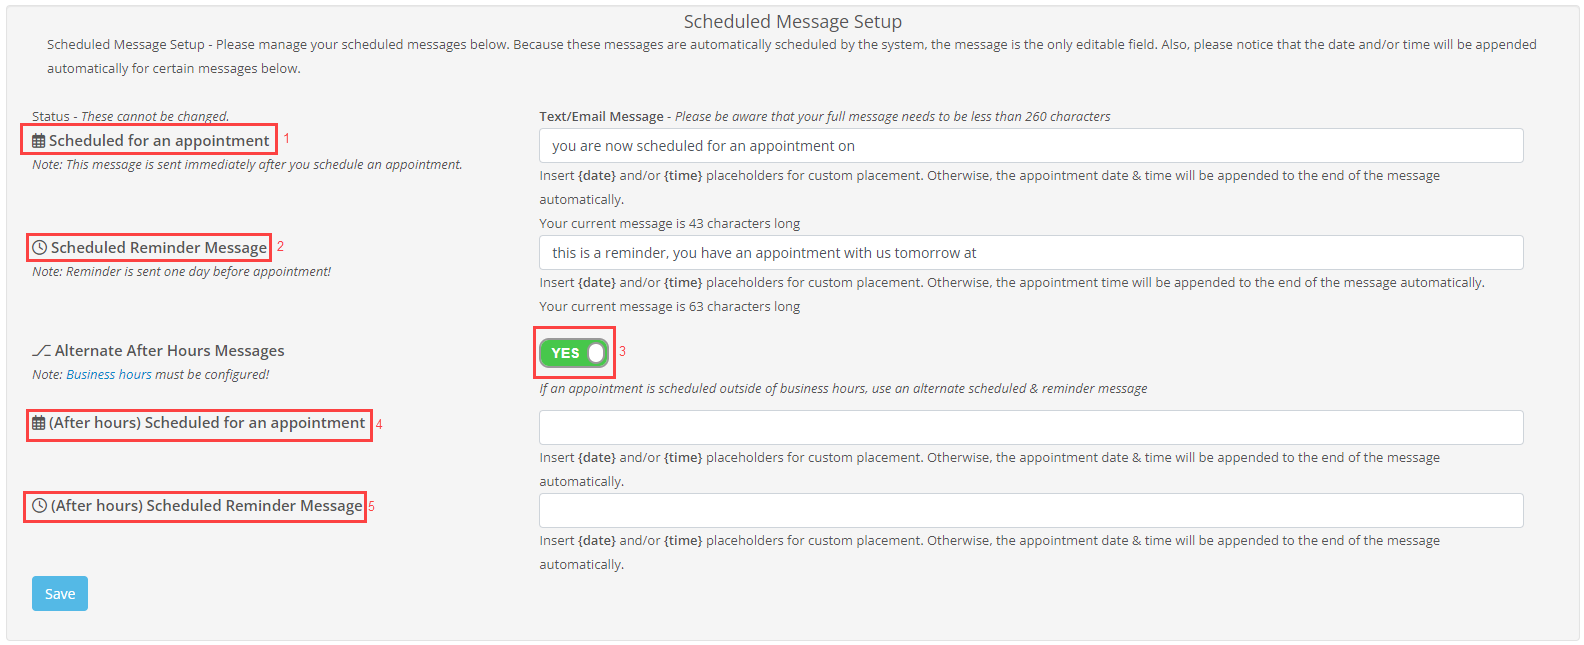
From here you will find the regular and after hours appointment and reminder message configurations towards the bottom of the page under the Scheduled Message Setup section. The different functions and configurations are detailed as numbered in the screenshot below.
- Scheduled for an appointment - This is the message that will be sent to the customer at the time of an appointment's confirmation, assuming this option is enabled on the Company Setup page. This message will automatically begin with "Hello, " or "Hello {Customer_First_Name}, " depending on whether the Use First Name option is enabled on the Company Setup page. You can place {date} and/or {time} anywhere in this message to customize this fully, and if neither is used as in the image above the date and time will automatically be appended to the end of the message.
- Scheduled reminder message - This is the message that will be sent to the customer 24-hours prior to their scheduled appointment time, and like the scheduled for an appointment section with automatically have the same greetings appended to the beginning. As with the Scheduled for an appointment section, the {date} and/or {time} can be placed anywhere for full customization, or they will be appended automatically to the end if not used.
- This toggle is to enable or disable the after hours appointment message feature, you can continue to use the previously defined appointment confirmation and reminder messages for all automated texts to customers directly above this segment without use of the alternate message. This option can be enabled or disabled at any time, however existing scheduled messages will not be sent with the modified templates. Ex. An appointment is scheduled outside of business hours before enabling the alternate messages will still receive the standard appointment confirmation, and will not receive an updated confirmation after enabling this feature without first modifying the existing appointment. Be advised that fields 4 & 5 will not be visible if this toggle is set to 'No'
- If an appointment is scheduled outside of the configured business hours, be it by integration appointment sync (not available for all Shop Management System integrations), manual entry by a Service Writer/admin profile within autoflow, or by a kiosk scheduled appointment. This confirmation will only send when an appointment is made or modified to be outside of business hours. If a date is scheduled to be unavailable for appointments on the calendar after an appointment is made through any of these methods, a new confirmation will not be sent without being modified. The same {date} and {time} placeholders used in the appointment message configuration can be used to include the specified date and time of an appointment to the customer, and will automatically filled with the relevant details. Both, either, or neither placeholders can be used in your preferred configuration.
- The reminder message, which is sent 24 hours prior to the scheduled appointment time, can also be configured to remind any customer who may not have contacted to reschedule an appointment that is designated outside of business hours. If an appointment was made in a particular time slot before the time was blocked out by another even, such as a scheduled holiday in the autoflow calendar, this message will be sent to request the customer to provide a new date and time based on current availability configured. The same {date} and {time} placeholders used in the appointment message configuration can be used to include the specified date and time of an appointment to the customer, and will automatically filled with the relevant details. Both, either, or neither placeholders can be used in your preferred configuration.
The message length restrictions for these options are the same as the standard appointment confirmation and reminders, and must be less than 260 characters. Once set these messages can still be modified freely, as in the case of customizing the regular appointment confirmation and reminder messages. As with all automated messages greetings and shop signature farewells are included automatically when the message is sent.
Related Articles
Workflow Setup - Protractor
To first access this page you will need to be logged into autoflow using an admin role profile. (These setup options will not be available to Service Writer or Technician profiles) From the top right drop down menu you would select the Workflow Setup ...Workflow Setup - Omnique
To first access this page you will need to be logged into autoflow using an admin role profile. (These setup options will not be available to Service Writer or Technician profiles) From the top right drop down menu you would select the Workflow Setup ...Workflow Setup - Shop-Ware
To first access this page you will need to be logged into autoflow using an admin role profile. (These setup options will not be available to Service Writer or Technician profiles) From the top right drop down menu you would select the Workflow Setup ...How To Setup Service Reminders
Autoflow is now capable of setting up automatic and manual service reminders for your customers! To get started with setting up your service reminders, please read the following. 1. Make sure you are signed in as an admin. 2. From the admin drop down ...Additional Features in Workflow Setup
Customize your scheduled and follow up texts Scheduled Messages These are unique appointment confirmations and reminders When the appoint is made, the message is sent immediately Includes date and time. Also includes greeting / signature One day ...